Butterfinger Pie
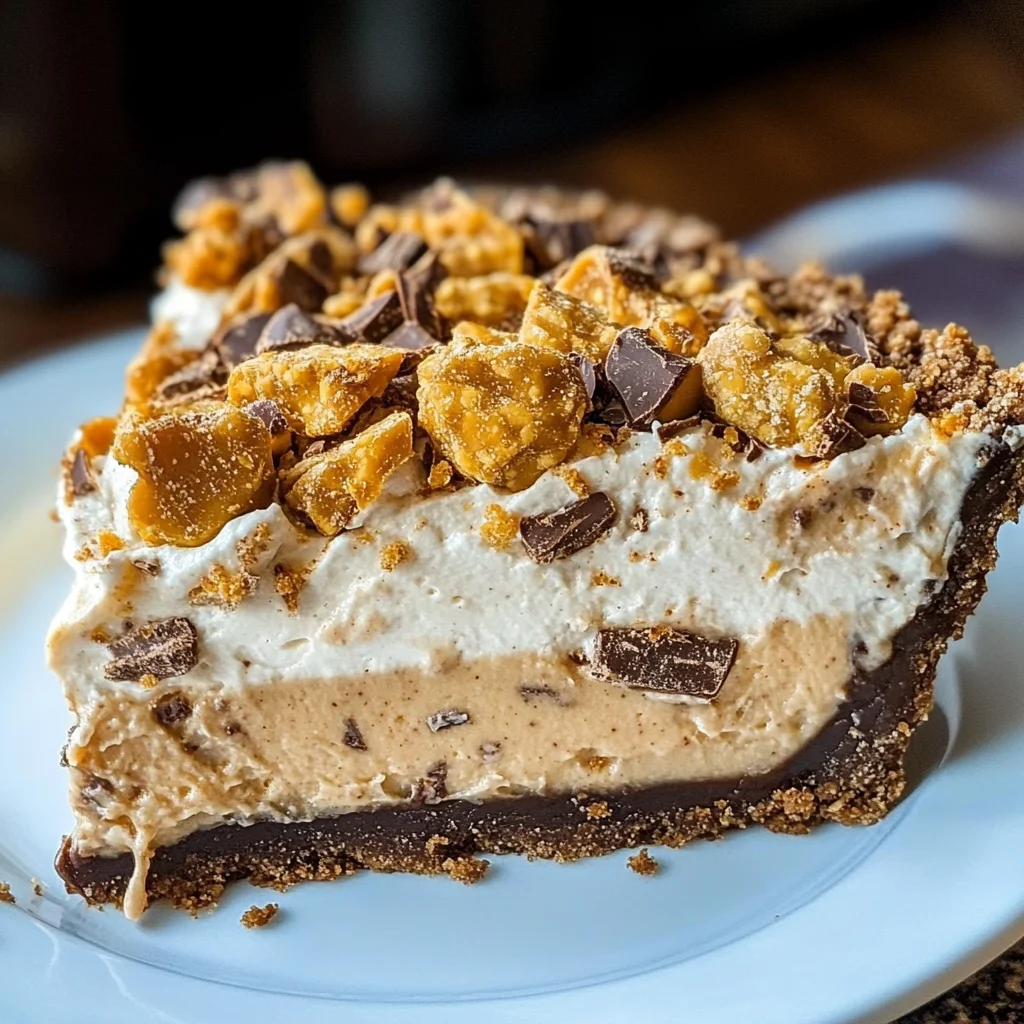
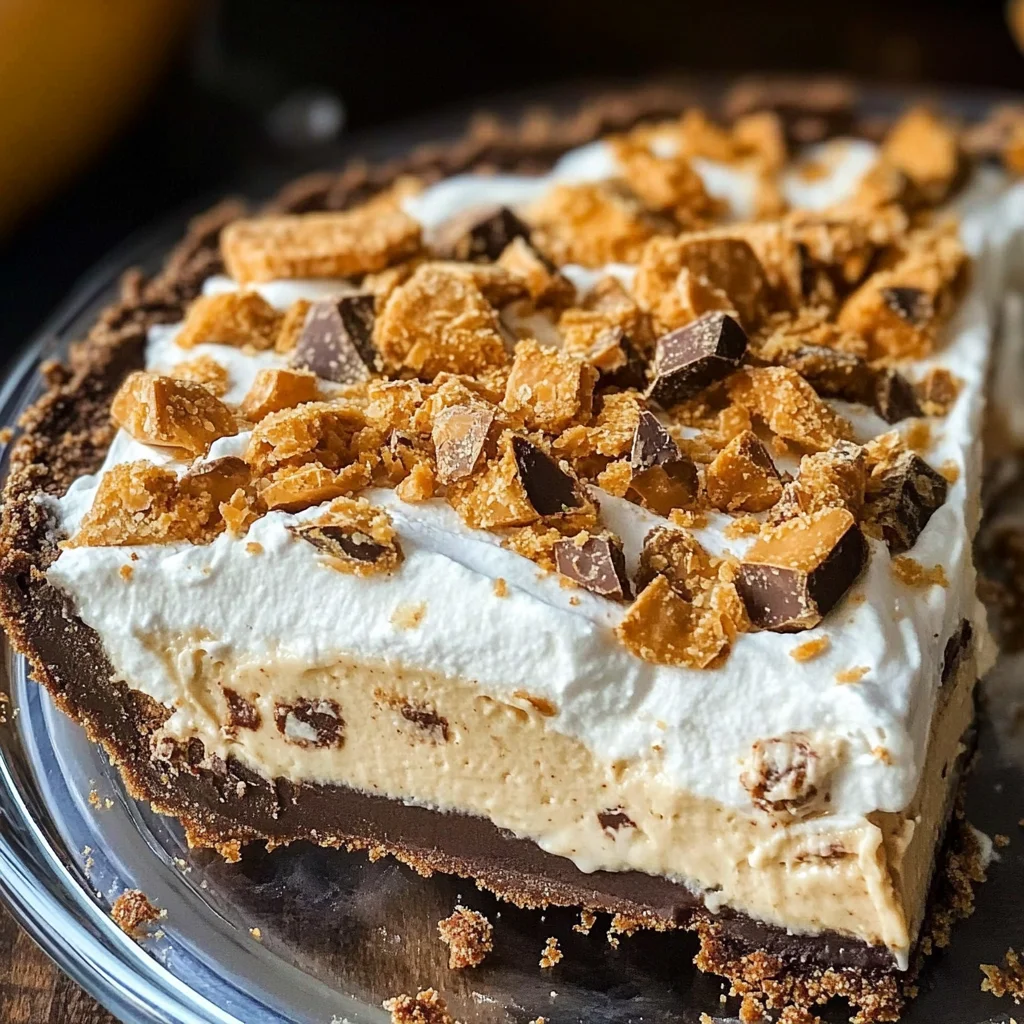
This cool and creamy Butterfinger Pie is the stuff dreams are made of! It’s a delightful no-bake dessert that’s perfect for any occasion, from family gatherings to potlucks. With its rich flavors and simple preparation, this pie will become a favorite among your guests. The combination of cream cheese, peanut butter, and crushed Butterfinger bars creates a unique treat that everyone will love.
Why You’ll Love This Recipe
- Quick Preparation: This Butterfinger Pie takes only 15 minutes to prepare, allowing you more time to enjoy with friends and family.
- No-Bake Delight: Enjoy a delicious dessert without the need for baking. Just mix and chill!
- Rich Flavor: The blend of creamy peanut butter and sweet Butterfinger bars offers an irresistible taste.
- Versatile Serving Options: Perfect for parties, holidays, or simply as a sweet treat after dinner.
- Family-Friendly: Kids will love helping out in the kitchen with this fun and easy recipe!
Tools and Preparation
Before diving into making your Butterfinger Pie, ensure you have the right tools at hand. These will help streamline your process and ensure great results.
Essential Tools and Equipment
- Electric mixer
- Large mixing bowl
- Measuring cups
- Spatula
- Store-bought pie crust
Importance of Each Tool
- Electric mixer: This tool ensures your ingredients blend smoothly without lumps, creating a creamy texture.
- Large mixing bowl: A spacious bowl makes it easier to combine all the ingredients without spills.
- Spatula: Ideal for folding in delicate ingredients like Cool Whip without deflating them.
Ingredients
To make this fantastic Butterfinger Pie, gather the following ingredients:
For the Filling
- 1 (8-ounce) package cream cheese (room temperature)
- 1/2 cup creamy peanut butter
- 2 teaspoons vanilla extract
- 1 1/2 cups powdered sugar
- 1 (12.5-ounce) bag fun-sized butterfinger bars (crushed; reserve 2 bars to sprinkle on top)
- 1 (8-ounce) container Cool Whip (thawed)
For the Crust
- 1 store-bought oreo or chocolate graham cracker crust
How to Make Butterfinger Pie
Step 1: Prepare Your Mixing Bowl
Start by placing the room-temperature cream cheese and creamy peanut butter in a large mixing bowl.
Step 2: Mix Until Smooth
Use an electric mixer to beat these ingredients together until they are smooth. Add in the vanilla extract during this step.
Step 3: Add Sweetness
Gradually beat in the powdered sugar until everything is well combined and smooth.
Step 4: Fold in Butterfingers
Gently fold in the crushed Butterfinger bars into the mixture until evenly distributed.
Step 5: Incorporate Cool Whip
Now, carefully fold in the thawed Cool Whip until just combined. This helps maintain the lightness of your filling.
Step 6: Assemble Your Pie
Spread the filling evenly into your prepared crust. Don’t forget to sprinkle the reserved crushed Butterfinger bars on top for that extra crunch!
Step 7: Chill Before Serving
Refrigerate your pie for at least 4 hours before serving to allow it to set properly. Enjoy your delicious Butterfinger Pie!
How to Serve Butterfinger Pie
Butterfinger Pie is a delightful dessert that can be enjoyed in various ways. Serving it with the right accompaniments can enhance its creamy texture and rich flavor.
With Fresh Fruits
- Berries: Serve with a mix of strawberries, blueberries, and raspberries for a fresh, tangy contrast.
- Bananas: Sliced bananas add natural sweetness and complement the pie’s flavors beautifully.
With Whipped Topping
- Extra Cool Whip: Add a dollop of Cool Whip on top for added creaminess.
- Chocolate Whipped Cream: For a chocolate twist, try using chocolate-flavored whipped cream.
As Individual Portions
- Mini Cups: Spoon Butterfinger Pie into small cups for individual servings at parties or gatherings.
- Dessert Shooters: Layer the pie filling in shot glasses for a fun presentation.
With Chocolate Drizzle
- Chocolate Sauce: Drizzle warm chocolate sauce over each slice for an indulgent touch.
- Caramel Sauce: A caramel drizzle can also add sweetness and flavor depth.
How to Perfect Butterfinger Pie
Perfecting your Butterfinger Pie is easy with these simple tips. Follow these suggestions to ensure your pie turns out delicious every time!
- Use Room Temperature Ingredients: Softened cream cheese blends better, resulting in a smoother filling.
- Crush Butterfingers Well: Ensure they are finely crushed to distribute flavor evenly throughout the pie.
- Chill Thoroughly: Refrigerate for at least 4 hours; this helps the flavors meld and sets the pie correctly.
- Experiment with Crusts: Try different flavored crusts like graham cracker or chocolate cookie for variety.
- Garnish Creatively: Add chopped nuts or sprinkles on top for extra texture and visual appeal.
Best Side Dishes for Butterfinger Pie
Pairing side dishes with your Butterfinger Pie can elevate your dessert experience. Here are some great options that complement its rich taste:
- Vanilla Ice Cream: A classic choice that balances the dessert’s sweetness with creamy goodness.
- Fruit Salad: A refreshing mix of seasonal fruits adds brightness and lightness to your meal.
- Chocolate Chip Cookies: The chewy texture of cookies pairs nicely with the smoothness of the pie.
- Caramel Popcorn: Sweet and crunchy, it serves as a fun snack alongside each bite of pie.
- Nutty Trail Mix: A blend of nuts and dried fruits offers a savory contrast to the sweet pie.
- Coffee or Tea: A warm beverage provides a comforting finish after enjoying your dessert.
Common Mistakes to Avoid
Making Butterfinger Pie can be simple, but there are a few common mistakes that can affect your results. Here are some tips to ensure your pie turns out perfectly.
- Bold Flavor: Using unsweetened peanut butter can lead to a less satisfying taste. Always opt for creamy, sweet peanut butter for the best flavor.
- Bold Cream Cheese Temperature: Forgetting to let cream cheese come to room temperature can result in lumps in your filling. Make sure it’s softened before mixing.
- Bold Mixing Technique: Overmixing the Cool Whip can deflate it, making your pie less fluffy. Gently fold it into the mixture instead of beating.
- Bold Crust Choice: Using a crust that doesn’t complement the filling can alter the pie’s overall taste. Stick with an Oreo or chocolate graham cracker crust for the best balance.
- Bold Chilling Time: Not allowing enough time for the pie to chill can prevent it from setting properly. Always refrigerate for at least 4 hours before serving.
Storage & Reheating Instructions
Refrigerator Storage
- Store leftovers in an airtight container.
- The pie will keep well in the refrigerator for up to 5 days.
Freezing Butterfinger Pie
- Wrap slices tightly in plastic wrap and place them in a freezer-safe container.
- It can be frozen for up to 3 months.
Reheating Butterfinger Pie
- Oven: Preheat to 350°F (175°C) and heat for about 10-15 minutes, covered with foil.
- Microwave: Heat individual slices on medium power for 30 seconds until warm.
- Stovetop: Use a skillet on low heat, covering it with a lid to warm through gently.
Frequently Asked Questions
Here are some common questions about Butterfinger Pie, along with their answers.
What is Butterfinger Pie?
Butterfinger Pie is a no-bake dessert made with cream cheese, peanut butter, crushed Butterfinger bars, and Cool Whip, all set in a chocolate crust.
How long does Butterfinger Pie last?
When stored properly in the refrigerator, Butterfinger Pie lasts up to 5 days. You can also freeze it for longer storage.
Can I customize my Butterfinger Pie?
Absolutely! You can add other candy bars or toppings like whipped cream or chopped nuts for extra flavor and texture.
Is Butterfinger Pie suitable for gatherings?
Yes! This dessert is perfect for potlucks and family gatherings due to its crowd-pleasing flavors and easy preparation.
Final Thoughts
Butterfinger Pie is not only delicious but also versatile. Its creamy texture and delightful crunch make it a favorite among dessert lovers. Feel free to customize it with different toppings or mix-ins to suit your taste. Give this recipe a try; you won’t be disappointed!
Butterfinger Pie
Experience the ultimate indulgence with this cool and creamy Butterfinger Pie, a no-bake dessert that’s perfect for any occasion, from family gatherings to potlucks. With just a few simple ingredients, this delightful treat combines the rich flavors of cream cheese and peanut butter with crushed Fun-sized Butterfinger bars, creating a unique and irresistible dessert that everyone will love. Quick to prepare in just 15 minutes, this pie is not only easy to make but also allows you more time to enjoy with loved ones. Chilled until set, every bite offers a perfect blend of creamy texture and crunchy sweetness that your guests will be asking for seconds!
- Prep Time: 15 minutes
- Cook Time: None
- Total Time: 0 hours
- Yield: Serves approximately 8 slices 1x
- Category: Dessert
- Method: No-Bake
- Cuisine: American
Ingredients
- 1 (8-ounce) package cream cheese (room temperature)
- 1/2 cup creamy peanut butter
- 2 teaspoons vanilla extract
- 1 1/2 cups powdered sugar
- 1 (12.5-ounce) bag fun-sized Butterfinger bars (crushed; reserve 2 bars for topping)
- 1 (8-ounce) container Cool Whip (thawed)
- 1 store-bought Oreo or chocolate graham cracker crust
Instructions
- In a large mixing bowl, combine room-temperature cream cheese and creamy peanut butter.
- Using an electric mixer, beat until smooth; add vanilla extract.
- Gradually mix in powdered sugar until well combined.
- Gently fold in crushed Butterfinger bars until evenly distributed.
- Carefully incorporate thawed Cool Whip into the mixture.
- Spread filling evenly into the prepared crust and top with reserved crushed Butterfinger bars.
- Refrigerate for at least 4 hours before serving.
Nutrition
- Serving Size: 1 slice
- Calories: 350
- Sugar: 30g
- Sodium: 250mg
- Fat: 22g
- Saturated Fat: 10g
- Unsaturated Fat: 10g
- Trans Fat: 0g
- Carbohydrates: 36g
- Fiber: 1g
- Protein: 5g
- Cholesterol: 35mg

